Localization (i18n)
Overview
The Localization (i18n) in Qodly provides built-in support for creating multilingual applications without requiring any manual coding. It enables developers to manage languages, create translation keys, configure dynamic translations for page elements, and allow end-users to switch languages at runtime.
Localization in Qodly is designed to integrate seamlessly into the visual development workflow. Developers can define locales, manage literals (translated text values), and bind language-switching mechanisms using qodlysources, without needing to manipulate data structures manually.
- Define supported application locales.
- Set a primary (default) locale for fallback.
- Create and manage translation keys linked to UI components.
- Edit literals per locale directly within the Webform Editor.
- Enable runtime language switching through the UserLanguage shared source.
- Export and import literals using CSV or JSON for external translation processes.
Key Concepts
| Term | Definition |
|---|---|
| Locale | A specific language or regional variation used for translations. |
| Primary Locale | The fallback language displayed when no user selection or supported browser language is available. |
| Literal | A piece of user-facing text that can have translations across multiple locales. |
| Key | A unique reference identifier linking a literal to its translations. |
| UserLanguage | A built-in shared source containing the currently selected locale and the list of supported locales. |
Localization Setup
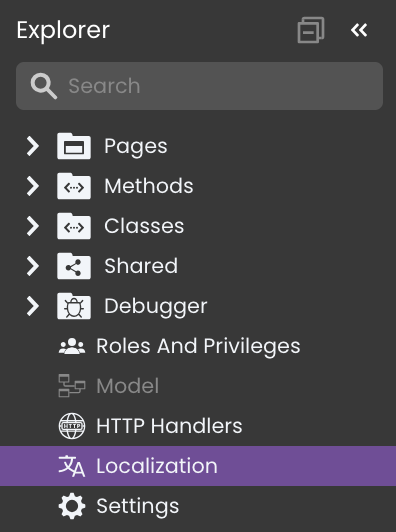
Accessing the Localization Page
The Localization page provides a centralized interface for managing application languages and translation keys.
It is accessible through the Explorer view within Qodly Studio.
From this page, developers can create supported locales, define primary locales, manage literals, and configure translations without modifying application logic.
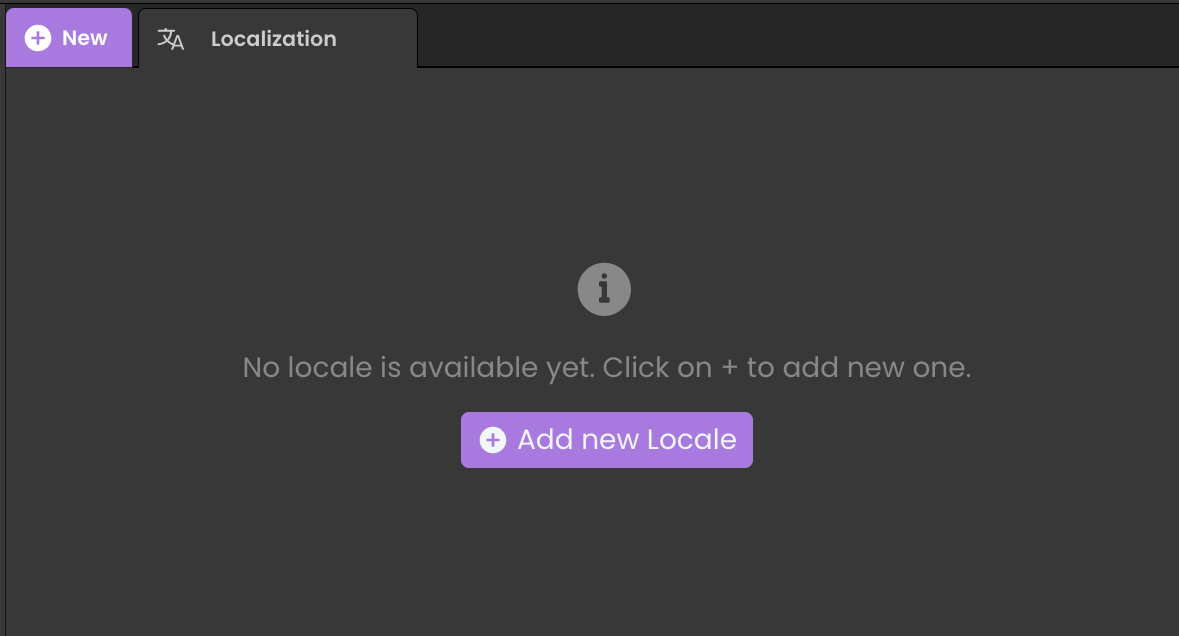
Creating Locales
A locale represents a specific language or regional variant that the application supports. Adding locales allows the application to adapt its content to different audiences.
To add supported languages:
-
Navigate to the Localization page.
-
Click Add new Locale to open the locale selection dropdown.
-
Choose the desired language from the list.
-
Validate the selection to add the locale.
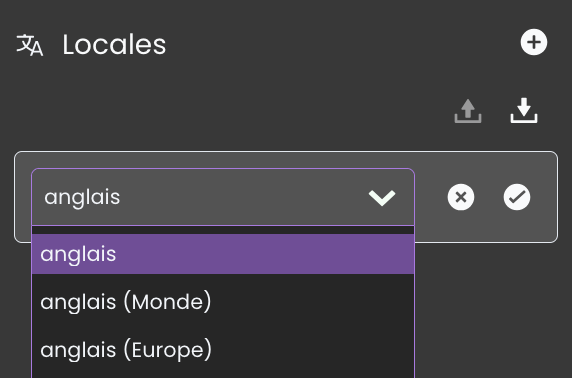
Developers can define multiple supported locales by clicking on the "+" button  .
.
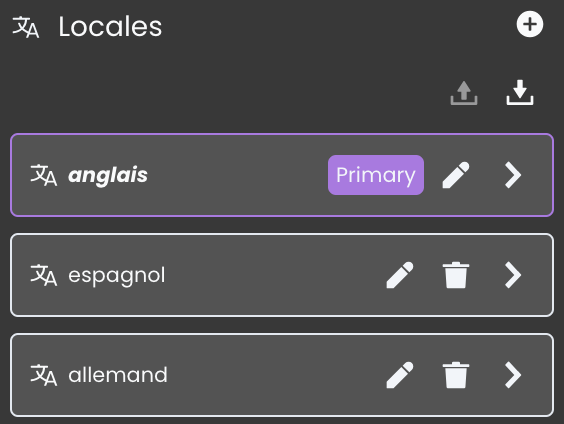
Setting the Primary Locale
One of the locales must be set as the Primary Locale, which acts as the default language whenever no user preference or browser match is available.
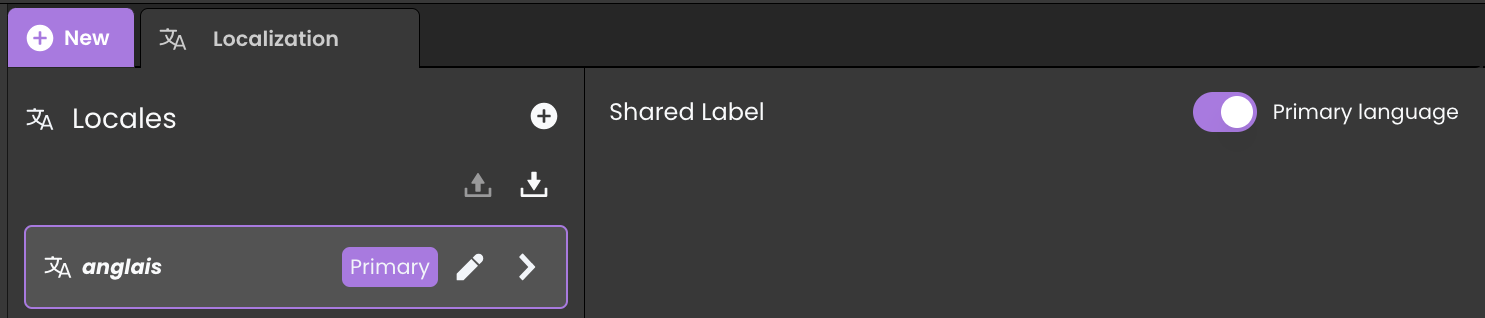
Setting a Primary Locale ensures consistent fallback behavior across user sessions and browsers.
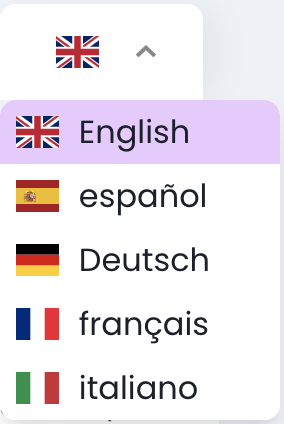
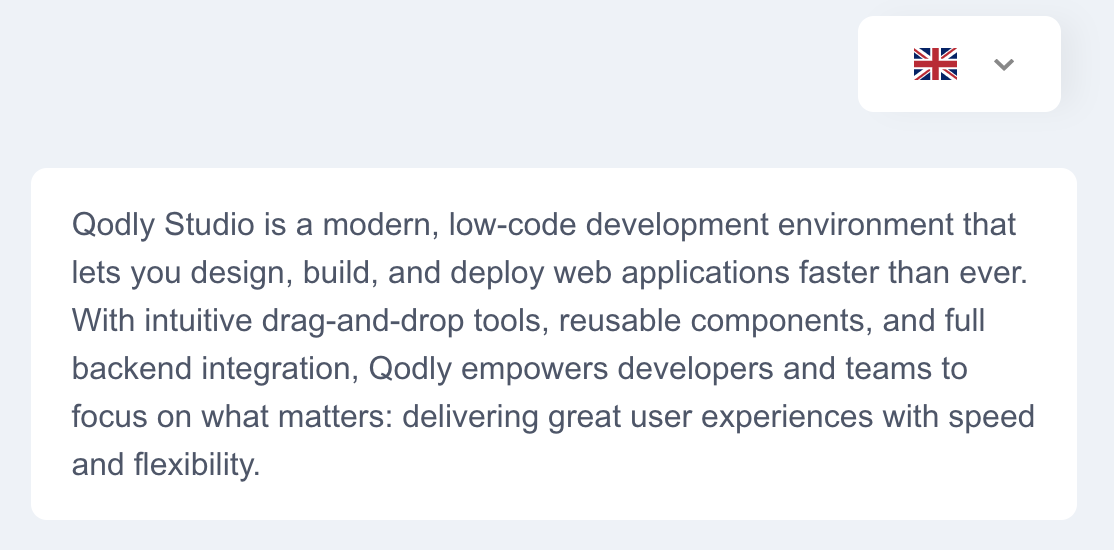
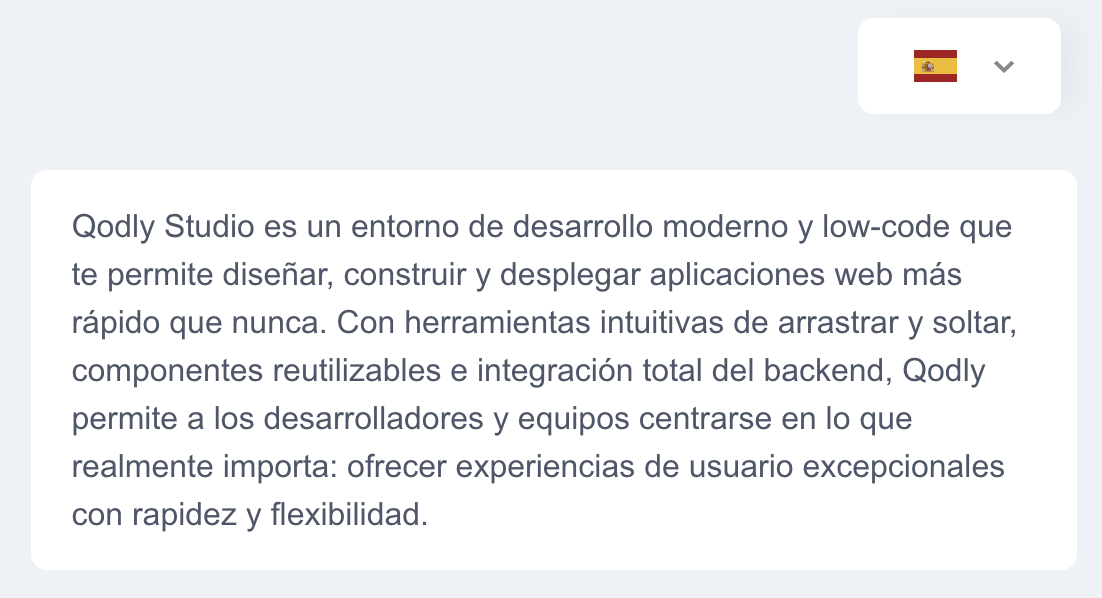
Previewing Locales in the Studio
By default, no locale is selected when opening a page in the Studio.

Developers can manually switch between configured locales during development to preview how translations appear across languages.
This is achieved by:
-
Clicking the Localization button
 in the Header panel of the page.
 -
Selecting any of the available locales to simulate the translated application view.
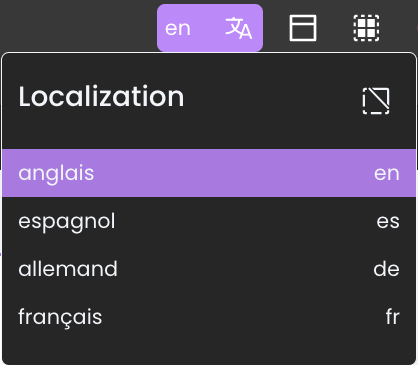
This preview is strictly for design-time visualization within the canvas and does not affect runtime user sessions or language selection persistence.
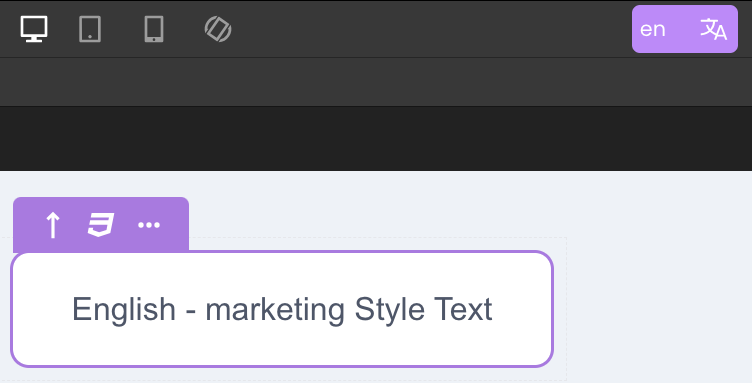
Translating Content
A literal is any visible text in the application interface (e.g., labels, button texts, titles). By default, each literal exists independently for each locale page.
Manual Translation
Developers can manually modify the literal text directly in each locale's version without creating a translation key.

This method is simple for small applications but becomes harder to maintain as the number of locales grows.
Creating Translation Keys
For better scalability, literals can be assigned to translation keys. A translation key links a text element to a centralized reference, allowing it to be easily managed and translated across all supported locales.
Assigning a translation key enables centralized updates, reduces duplication, and ensures consistency when a literal is reused across different pages or components.
To create a translation key:
- Double-click the text within the text component you want to translate.
- From the tooltip, click on the i18n button
 .
.
- A modal will appear showing the current text value.
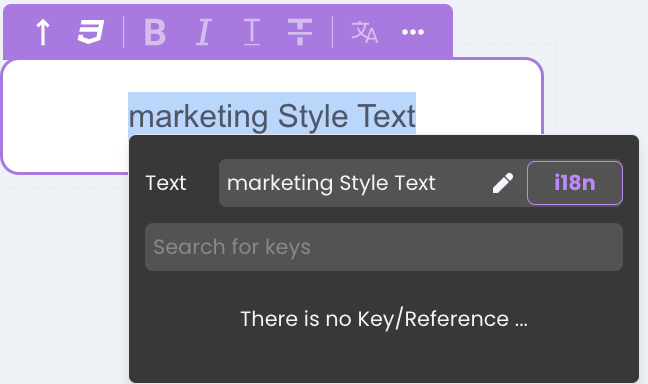
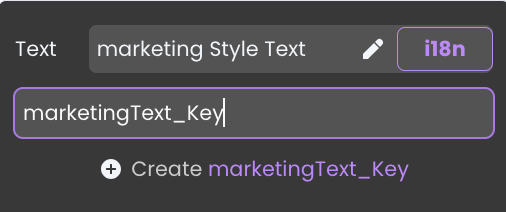
- In the Search for keys field, type the desired key name (for example,
marketingText_Key).
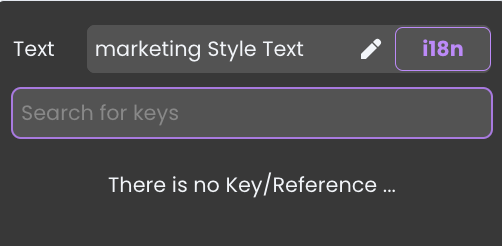
-
The system will suggest creating the key.
-
Click Create to link your text to the new key.
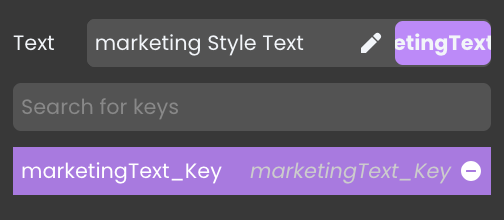
Once created:
-
The translation key will be automatically associated with the text.
 tip
tipThe key will appear under all locales.
-
Different values can be assigned for the same key depending on the active locale.
Translation Key Scenarios
Here’s how key assignment works when localizing content:
-
Assigning a Key in the Base State (No Locale Selected): When no specific locale is selected (you’re in the base state), clicking the purple i18n button adds the key to all locales.
-
Assigning a Key While a Locale is Selected: If a locale is selected when you click the i18n button, the key is still added to all locales, including the base state.
-
Manually Editing Labels per Locale (No Key Used): Instead of using keys, you can manually update the Label field for each locale.
- Select a locale and directly type the desired label.
- This is quick and flexible but may become harder to manage at scale.
- Use the approach that best matches the complexity and reuse patterns of your UI labels.
Removing a Key from a Literal
If needed, you can remove a translation key association from a text component:
-
Click again on the i18n button from the component’s tooltip.
-
In the key field, click the remove key ("-") button
 next to the assigned key.
This action will unlink the text from the translation key, allowing it to behave as a standard independent literal again.
Removing a key from a literal in a specific locale will only affect that locale. The key remains available and associated in other locales where it has already been used.
Configuring Key Values Per Locale
Translation keys maintain a single unique identifier across all locales. However, the value associated with the key is locale-specific, allowing developers to configure different translations for each supported language.
To configure key values:
- Navigate to the Localization page.
- Select the desired locale.
- Locate the relevant translation key.
- Edit the literal value for that locale.
- Confirm the changes.

By switching between locales inside the Studio and previewing the pages, developers can immediately see how each configured translation appears for different languages.
When creating locales for the first time, no keys exist initially.
- The first key must be created while translating elements directly on the page using the i18n buttton.
- Once at least one key has been created through a component (e.g., a text field, button label), the Localization page becomes fully enabled for direct key management.
- After the first key is created, you can create additional translation keys directly from the Localization page, even without selecting elements on the page.
This ensures that key management is progressively unlocked as localization is set up.
Add i18n for Other Specific Components
For components other than the Text component, adding i18n translation keys is done directly through the Properties panel in Qodly Studio.
For example, to localize the label of a Button component:
- Select the component in your page.
- Go to the Properties tab in the right-hand panel.
- Locate the Label/Title field.
- You have three options:
- Assign a key to all locales: Click the purple i18n button next to the label field without selecting a locale. This adds the key for all supported locales.
- Assign a key to a specific locale: First select the target locale from the locale switcher, then click the i18n button. This will assign the key only for that selected locale.
- Manually edit label value: You can also manually change the value of the label per locale without using a translation key.
Managing Locales
Editing a Locale
To edit an existing locale:
- Navigate to the Localization page from the Explorer.
- Locate the locale you want to modify in the list.
- Click on the Edit button
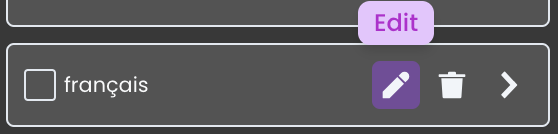 next to the locale name.
 - A language selector dropdown will appear.
- Choose a new language to replace the current one.
Removing a Locale
To completely remove a locale:
- Navigate to the Localization page from the Explorer.
- Find the locale you wish to remove.
- Click on the Delete button
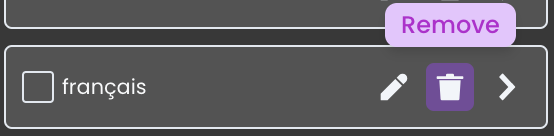 next to the locale name.
Removing a locale will:
- Delete all translation keys associated with that locale.
- Automatically update the
UserLanguage.supportedarray, removing the deleted language from the runtime switching options.
Managing Keys
Editing a Translation Key
To edit the value of a translation key for a specific locale:
- Go to the Localization page in Qodly Studio.
- Select the desired locale.
- Locate the key you wish to update from the list.
- Click the edit icon or directly click into the value field.
- Modify the value and click the ✔ button to confirm your changes or ✖ to cancel.

Deleting a Translation Key
To delete a translation key entirely from the Localization page:
- Open the Localization page.
- Navigate to the locale where the key is visible.
- Locate the key in the list and click the delete icon.

Deleting a key will:
- Remove the key itself.
- Remove all translations associated with it across all locales.
- Unlink any components or literals that were referencing the deleted key.
Use this option only when the key is no longer needed in the application.
Runtime Language Switching
To enable dynamic, user-driven language switching at runtime, the application must be configured to bind to the UserLanguage shared Qodly source.
Runtime switching involves the following configuration steps:
-
Bind the
UserLanguage.supportedto the listbox qodly source. -
Bind the
UserLanguage.selectedto the Selected Element* of the listbox.
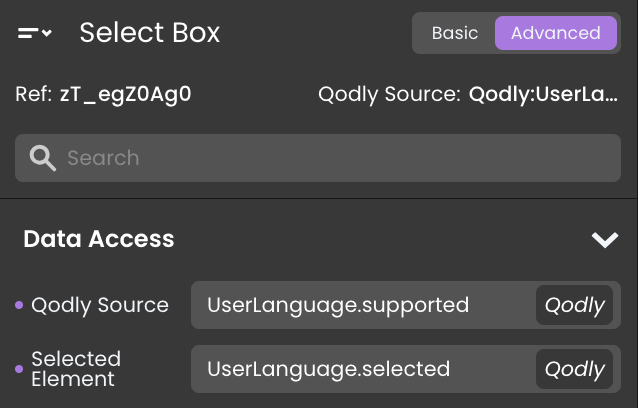
This binding enables users to pick a language dynamically from a dropdown list during runtime.
When the application is rendered:
- The select box allows the user to switch between available languages.
-
Upon selecting a language, the value of
UserLanguage.selectedis updated. -
The application automatically refreshes the displayed text to match the translations configured for the selected locale.
If no UserLanguage binding is configured, language switching will not function in preview or renderer modes, even if locales exist.
Localization Feature Behavior
Localization in Qodly follows a layered priority model to determine which language is displayed to the end user at any given moment.
The priority order for language resolution is:
-
User-selected language: If the user manually selects a language during their session (for example, using a language switcher dropdown), the application will immediately display the selected language and store it in the session.
-
Session-stored language: On subsequent visits, if a session language has been previously stored, the application will automatically reuse this stored language preference without requiring user interaction.
-
Browser language detection: If no session language is set (e.g., on a user's very first login), the application will attempt to detect the user's browser language.
- If the browser language matches one of the supported locales configured in the Localization page, it will be used automatically.
-
Primary locale fallback: If neither a session language nor a matching browser language is available, the application will fall back to displaying the Primary locale defined in the Localization settings.
If a literal does not have a translation value for the active locale, the original text value (literal) will be displayed as-is.
This ensures that the application remains functional even if translations are incomplete.
Exporting and Importing Translations
Qodly makes it easy to manage translations externally by allowing you to export and import translation files. You can export your application's literals to a CSV or JSON file, translate them externally, and then re-import them back into your application.
Export First, then Import
Before you can import translations into Qodly, you must first export your application's literals. This ensures that the file structure matches the expected internal format.
You cannot create a valid translation file from scratch or use a file exported from another app. The import process requires a file that was originally exported from your own Qodly app.
Once exported, you can edit the file using a spreadsheet editor (for CSV) or a code/text editor (for JSON), then re-import it into your app.
Exporting Literals
The Export button is initially disabled  by default.
To enable the Export button:
-
You must select at least one locale from the Localization panel.
-
You can either:
-
Manually check the box for one or more locales.

-
Or check the Select All checkbox
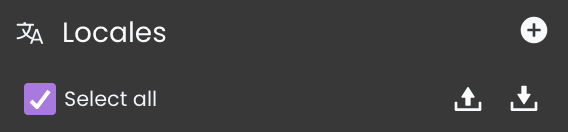 to select all available locales at once.
Once at least one locale is selected, the Export button becomes active
 .
. -
-
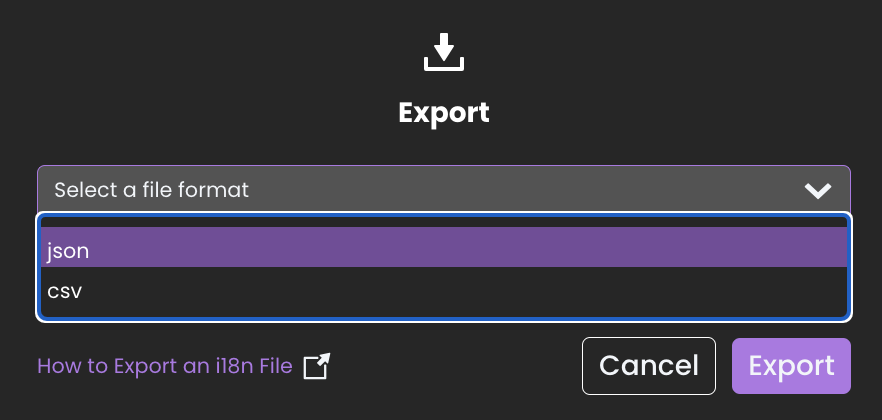
Click Export to open the export configuration modal.
Inside the Export modal:
- Select your preferred export format:
- CSV: Suitable for spreadsheet editing or basic translation workflows.
- JSON: Suitable for structured editing and external system integration.
- After selecting the format, click Export.
- Select your preferred export format:
A file will be generated and downloaded in the chosen format containing all literals for the selected locales.
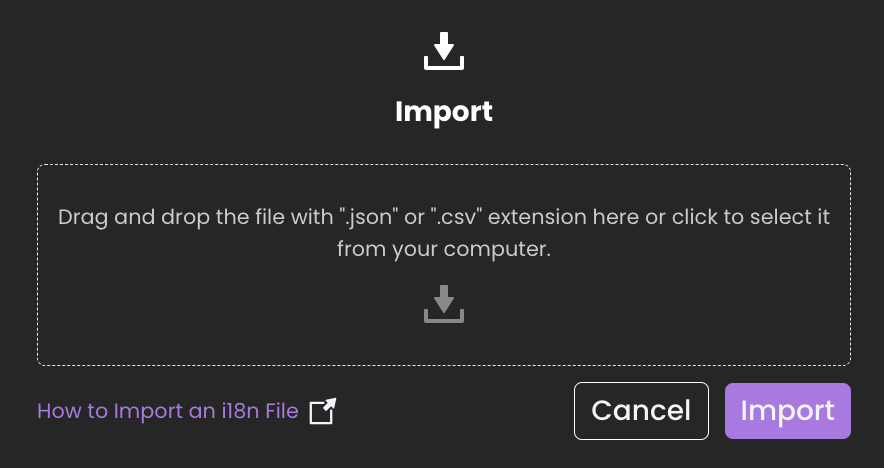
Importing Literals
To import translated literals:
- Click the Import button
 located next to the Export options.
-
A file selector will open.
-
Upload a valid
.csvor.jsonfile matching the export format. -
Once a file is selected, click Import to update your application's literals.
Supported File Formats
Qodly supports two export/import formats: JSON and CSV. Each format has its own structure and is suitable for different use cases.
JSON Format
The JSON format is structured for developers and tools that prefer a nested, key-based structure.
| Field | Description |
|---|---|
webforms.i18n | Maps component IDs to their translation data. Each ID represents a UI element. |
resolverName | The type of component (e.g., Label, Text, SelectBox). |
props | An array of translated properties, each with: __dataPath, __default, and one or more language translations. |
i18n | Contains all custom translation keys created by the developer. Each key includes a default value and language-specific values. |
Example:
{
"webforms": {
"i18n": {
"1DVbAUpEoU": {
"resolverName": "Label",
"props": [
{
"__dataPath": "text",
"__default": "Label",
"en": "Label",
"es": "Label"
}
]
},
...
}
},
"i18n": {
"marketingText_Key": {
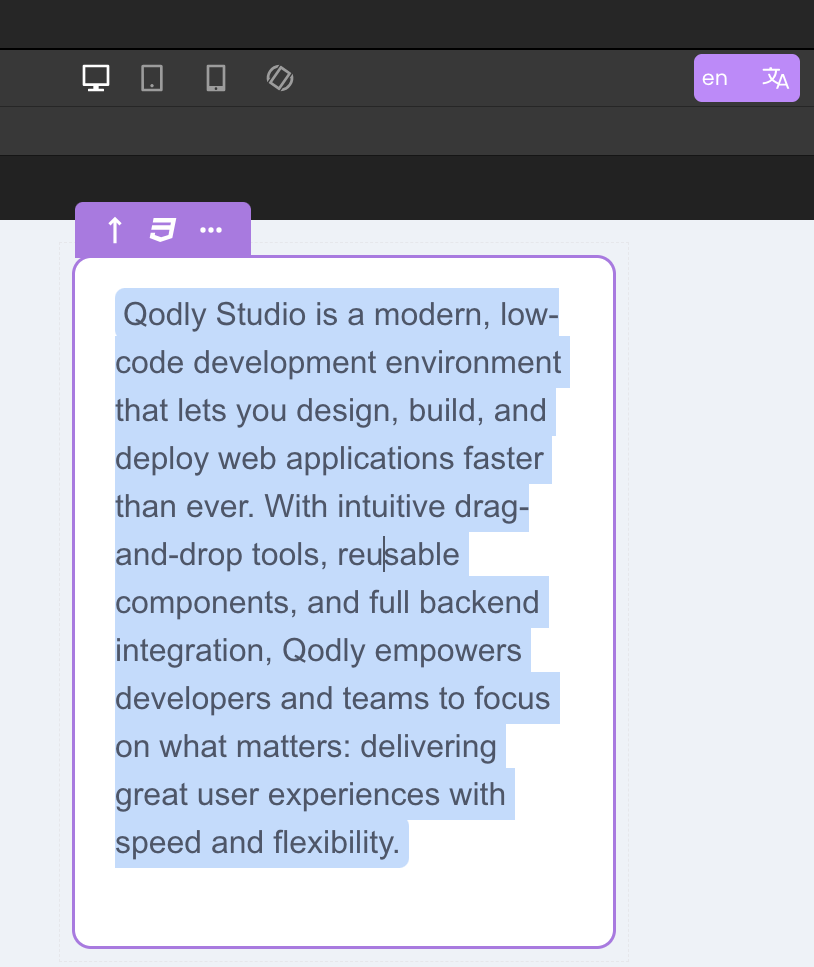
"default": "marketing Style Text",
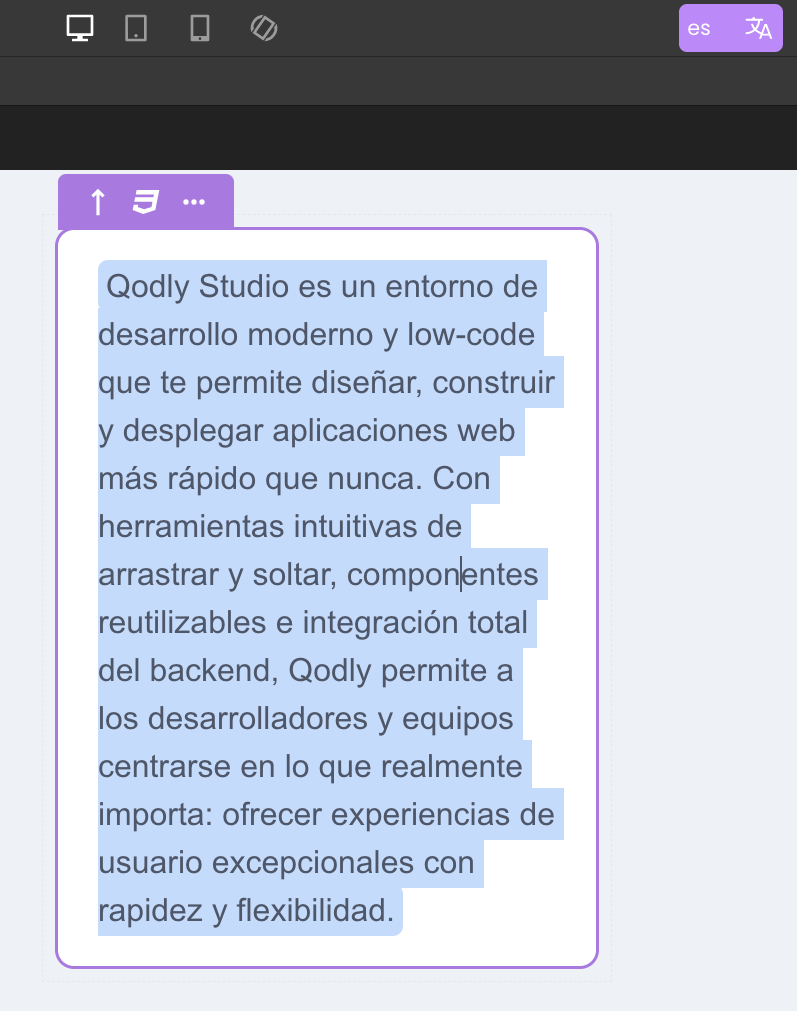
"en": "Qodly Studio is a modern, low-code development environment...",
"fr": "Qodly Studio est un environnement de développement..."
}
}
}
CSV Format
The CSV format is ideal for translation teams working in spreadsheet editors.
| Column | Description |
|---|---|
keys | Path to the literal or translation key. E.g., webforms.i18n.Z7Gc1JzZ16.doc or i18n.marketingText_Key.en. |
resolverName | Type of the UI component (Label, Text, etc.). |
__t | The default fallback value shown when a translation is missing. |
en, es, fr, etc. | Columns for each language code, containing the translated values. |
key_default | The value tied to a custom translation key when applicable. |
Example:
keys,resolverName,__t,en,es,key_default,zh,ja,it,de,fr
webforms.i18n.1DVbAUpEoU.text,Label,"Label","Label","Label"
i18n.marketingText_Key.en,,,,,Qodly Studio is a modern, low-code development environment...