HTTP Handlers
Overview
HTTP Request Handlers let you define how your application responds to HTTP requests by:
-
Listening for specific URL patterns (e.g., /api/users).
-
Handling different HTTP methods (e.g., GET, POST, PUT).
-
Linking these requests to specific logic in your application.
Why Use HTTP Request Handlers?
HTTP Request Handlers are ideal when:
-
Server-Side Logic is Required: Use HTTP Request Handlers to process server-side operations, such as interacting with databases, performing complex calculations, or handling business rules.
ExampleProcessing user authentication or generating reports dynamically.
-
API-Like Behavior is Needed: HTTP Request Handlers allow you to create RESTful endpoints that external systems or frontend applications can call.
ExampleA mobile app might send a POST request to /api/login to authenticate a user.
-
Scalable Interactions Across Multiple Clients: Unlike UI events (which are specific to the client session), HTTP Request Handlers work server-side and can handle multiple client requests simultaneously.
ExampleProcessing orders submitted from multiple web users simultaneously.
-
Custom URL Patterns and Verbs: Handlers let you define flexible URL patterns and handle different HTTP methods like GET or POST for the same URL.
ExampleUsing GET /products for listing products and POST /products for adding a new product.
-
For purely UI-based interactions, such as button clicks or navigating between pages in your app. These should be handled by front-end navigation events or on-click handlers.
-
For real-time interactions, like live updates to a page. Consider using WebSockets or a similar real-time communication mechanism instead.
Accessing HTTP Handlers
HTTP Handlers can be accessed and managed in Qodly Studio via the HTTP Handlers menu in the Explorer:
-
Locate the HTTP Handlers menu in the Explorer.
-
If the menu item is greyed out
 , click it to create the HTTPHandlers.json file.
 -
Once created, the file will open for editing
 .
.
By default, the HTTP Handlers UI is displayed instead of the code editor, allowing handlers to be managed via an intuitive graphical interface.
Handlers can be modified using either the UI or the JSON editor.
-
To switch to the code editor view, clicking the code editor icon
 is required.
 -
To return to the HTTP Handler UI, clicking the UI icon
 is necessary.
 -
Changes made in one view are automatically synchronized with the other.
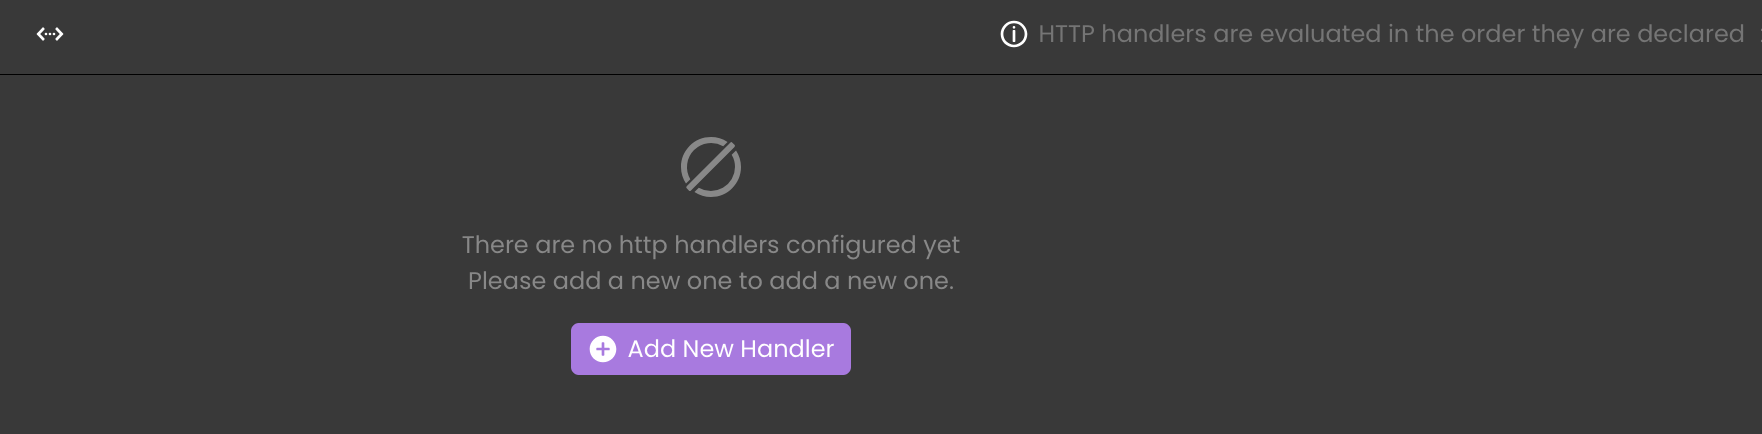
If no handlers are configured, a message appears stating: There are no HTTP Handlers configured yet. Click on the ➕ to add a new one..
Configuring HTTP Handlers
Add HTTP Handlers
HTTP Handlers can be added through both the UI and the code editor.
Using the HTTP Handler UI:
-
Clicking the
 button opens a form for inputting handler details.
 -
The form requires specifying the following details:
- Class: Selecting an existing class from the dropdown list or manually entering a class name.
- Method: Choosing an available method from the selected class or entering a method manually.
- Pattern: Defining the URL pattern.
- As Regex: Enabling this if using a regular expression for URL matching.
- Verbs: Selecting supported HTTP methods (GET, POST, PUT, DELETE).

-
Clicking "Confirm Changes"
 applies the configuration.
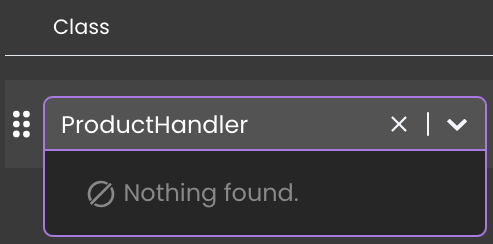
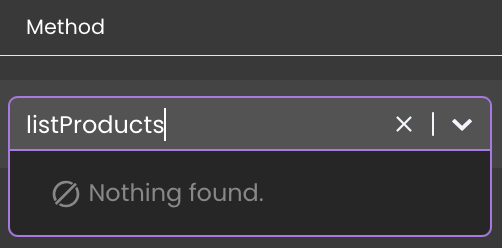
When manually entering a class name or method that does not exist, the system provides visual feedback to prevent misconfiguration.
- If the specified class or method does not exist, a
Nothing foundmessage appears, and the input field turns red. - Unrecognized entries are automatically removed when pressing Enter.
Only the four HTTP methods (GET, POST, PUT, DELETE) are supported. If an invalid method is typed and Enter is pressed, it will not be added.
In contrast, supported methods (GET, POST, PUT, DELETE) will have a dark grey background  to indicate they are valid.
Using the Code Editor:
Handlers can also be configured manually in the code editor, like:
[
    {
        "class": "CustomerHandler",
        "method": "getCustomer",
        "pattern": "customers",
        "verbs": "GET"
    },
    {
        "class": "AuthHandler",
        "method": "login",
        "regexPattern": "/auth/login",
        "verbs": "POST"
    }
]
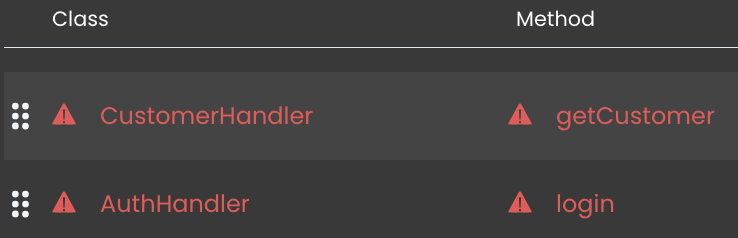
If a class or method that does not exist is added directly through the code editor, there is no immediate validation or error handling. However, when switching to the UI view, the system detects invalid entries and highlights them in red. An error message appears below the affected fields, stating: The singleton "Class or Method name" doesn't exist.
The code editor does not enforce immediate validation when an invalid HTTP method is added. If an unsupported HTTP method is entered in the JSON file, it will be saved without an error. However, when switching to the UI view the invalid method will be highlighted with a dark red background  , indicating that it is not a valid option.
Edit HTTP Handlers
Editing allows modifications to the class, method, URL pattern, or HTTP methods:
-
Use the UI to edit
 a handler and adjust its settings.
 -
Or, edit the JSON file directly for manual changes from the code editor.
Delete HTTP Handlers
Removing unnecessary handlers keeps request processing efficient:
-
Click the trash icon
 in the UI to delete a handler, then confirm the action.
 -
Alternatively, delete the handler entry from the code editor.
Duplicate Handlers
Duplicating handlers allows for quick replication:
-
Click the duplicate icon
 in the UI.
 -
Copy and paste JSON objects for manual duplication.
Reorder Handlers
Execution order can be adjusted:
-
Drag and drop handlers in the UI
 .
. -
Manually rearrange JSON objects in the file.
Matching Rules
Handlers can define URL patterns in two ways:
-
Prefix (pattern): Matches any URL that starts with the specified prefix.
ExampleA handler with "pattern":
productsmatches /products, /products/list, and /products/123. -
Regular Expression (regexPattern): Matches URLs that satisfy the specified regular expression.
ExampleA handler with "regexPattern":
/products/[0-9]+matches /products/123 and /products/456, but not /products/list.
Given the following configuration:
[
    {
        "class": "OrderHandler",
        "method": "getOrder",
        "regexPattern": "/orders/[0-9]+",
        "verbs": "GET"
    },
    {
        "class": "OrderHandler",
        "method": "listOrders",
        "pattern": "orders",
        "verbs": "GET"
    }
]
-
GET /orders/123: Matches the first handler (getOrder) because/orders/123satisfies the regular expression/orders/[0-9]+. -
GET /orders: Matches the second handler (listOrders) because/ordersis a prefix of the URL. -
POST /orders/123: Does not match any handler because neither handler supports the POST method.
Order of Execution
When an HTTP request is received, the system evaluates each handler in the order they appear in the HTTPHandlers.json file or the UI. The execution flow follows these steps:
-
The URL of the request is matched against the pattern or regexPattern of each handler.
-
The HTTP method (verb) of the request is checked against the verbs property of the handler.
-
Only the first matching handler is executed, even if subsequent handlers also match the request.
Given the following configuration:

A request to GET /products/123 will match both handlers:
- The first handler matches because the URL
/products/123satisfies the regular expression/products/[0-9]+. - The second handler matches because
/productsis a prefix of the URL.
[
    {
        "class": "ProductHandler",
        "method": "getProductDetails",
        "verbs": "GET",
        "id": "2jSeKR6tDs4KTKXrH3vVzR",
        "regexPattern": "/products/[0-9]+"
    },
    {
        "class": "ProductHandler",
        "method": "listProducts",
        "verbs": "GET",
        "id": "uJScfkSR6rkhoJSpfEiG6U",
        "pattern": "products"
    }
]
However, only the first handler getProductDetails is executed, as it appears first in the configuration.
Request Handler Code
Function Configuration
The HTTP Request handler code must be implemented in a function of a Shared singleton class.
If the singleton is missing or not shared, an error Cannot find singleton is returned by the server. If the class or the function defined as handler is not found, an error Cannot find singleton function is returned by the server.
Request handler functions are not necessarily shared, unless some request handler properties are updated by the functions. In this case, you need to declare its functions with the shared keyword.
Handling Errors
If no handler matches a request, the system automatically returns a 404 error. This behavior ensures that unexpected or unsupported requests do not disrupt the application.
To handle unmatched requests explicitly, you can define a fallback handler. Fallback handlers can be used to return custom error messages, redirect requests, or log unexpected behavior.
{
    "class": "ErrorHandler",
    "method": "handleNotFound",
    "regexPattern": "/.+",
    "verbs": "*"
}
This handler catches all requests that are not matched by earlier handlers. It can be used to:
-
Return a custom 404 page.
-
Log details about unmatched requests.
-
Redirect users to a default page.
Input: 4D.IncomingMessage Class Instance
When a request is intercepted by the handler, it is received on the server as an instance of the 4D.IncomingMessage class.
This object provides all necessary request information, including the request URL, verb, headers, URL parameters, and request body. The request handler can use this information to trigger the appropriate business logic.
Output: 4D.OutgoingMessage Class Instance
The request handler can return an object instance of the 4D.OutGoingMessage class, which represents web content ready for a browser to handle, such as a file content or a structured response.
Example
The 4D.IncomingMessage class provides functions to retrieve headers and the body of the request.
Below is an example of an HTTP handler that processes a file upload.
[
    {
        "class": "UploadFile",
        "method": "uploadFile",
        "regexPattern": "/putFile",
        "verbs": "POST"
    }
]
The request URL: /putFile?fileName=testFile
-
The binary content of the file is sent in the request body.
-
The POST verb is used.
-
The filename is included as a query parameter (fileName).
-
The filename is extracted using the
urlQueryobject.
    //UploadFile class

shared singleton constructor()


function uploadFile(request : 4D.IncomingMessage) : 4D.OutgoingMessage

    var response = 4D.OutgoingMessage.new()

    var body = "Not supported file"
    var fileName, fileType : string
    var file : 4D.File
    var picture : picture
    var created : boolean

    fileName = request.urlQuery.fileName
    fileType = request.getHeader("Content-Type")

    switch
        : (fileType == "application/pdf")
            file = file("/PACKAGE/Files/"+fileName+".pdf")
            created = file.create()
            file.setContent(request.getBlob())
            body = "Upload OK - File size: "+string(file.size)

        : (fileType == "image/jpeg")
            file = file("/PACKAGE/Files/"+fileName+".jpg")
            picture =  request.getPicture()
            body = "Upload OK - Image size: "+string(file.size)

    end

    response.setBody(body)
    response.setHeader("Content-Type", "text/plain")

    return response