Console Overview
Overview
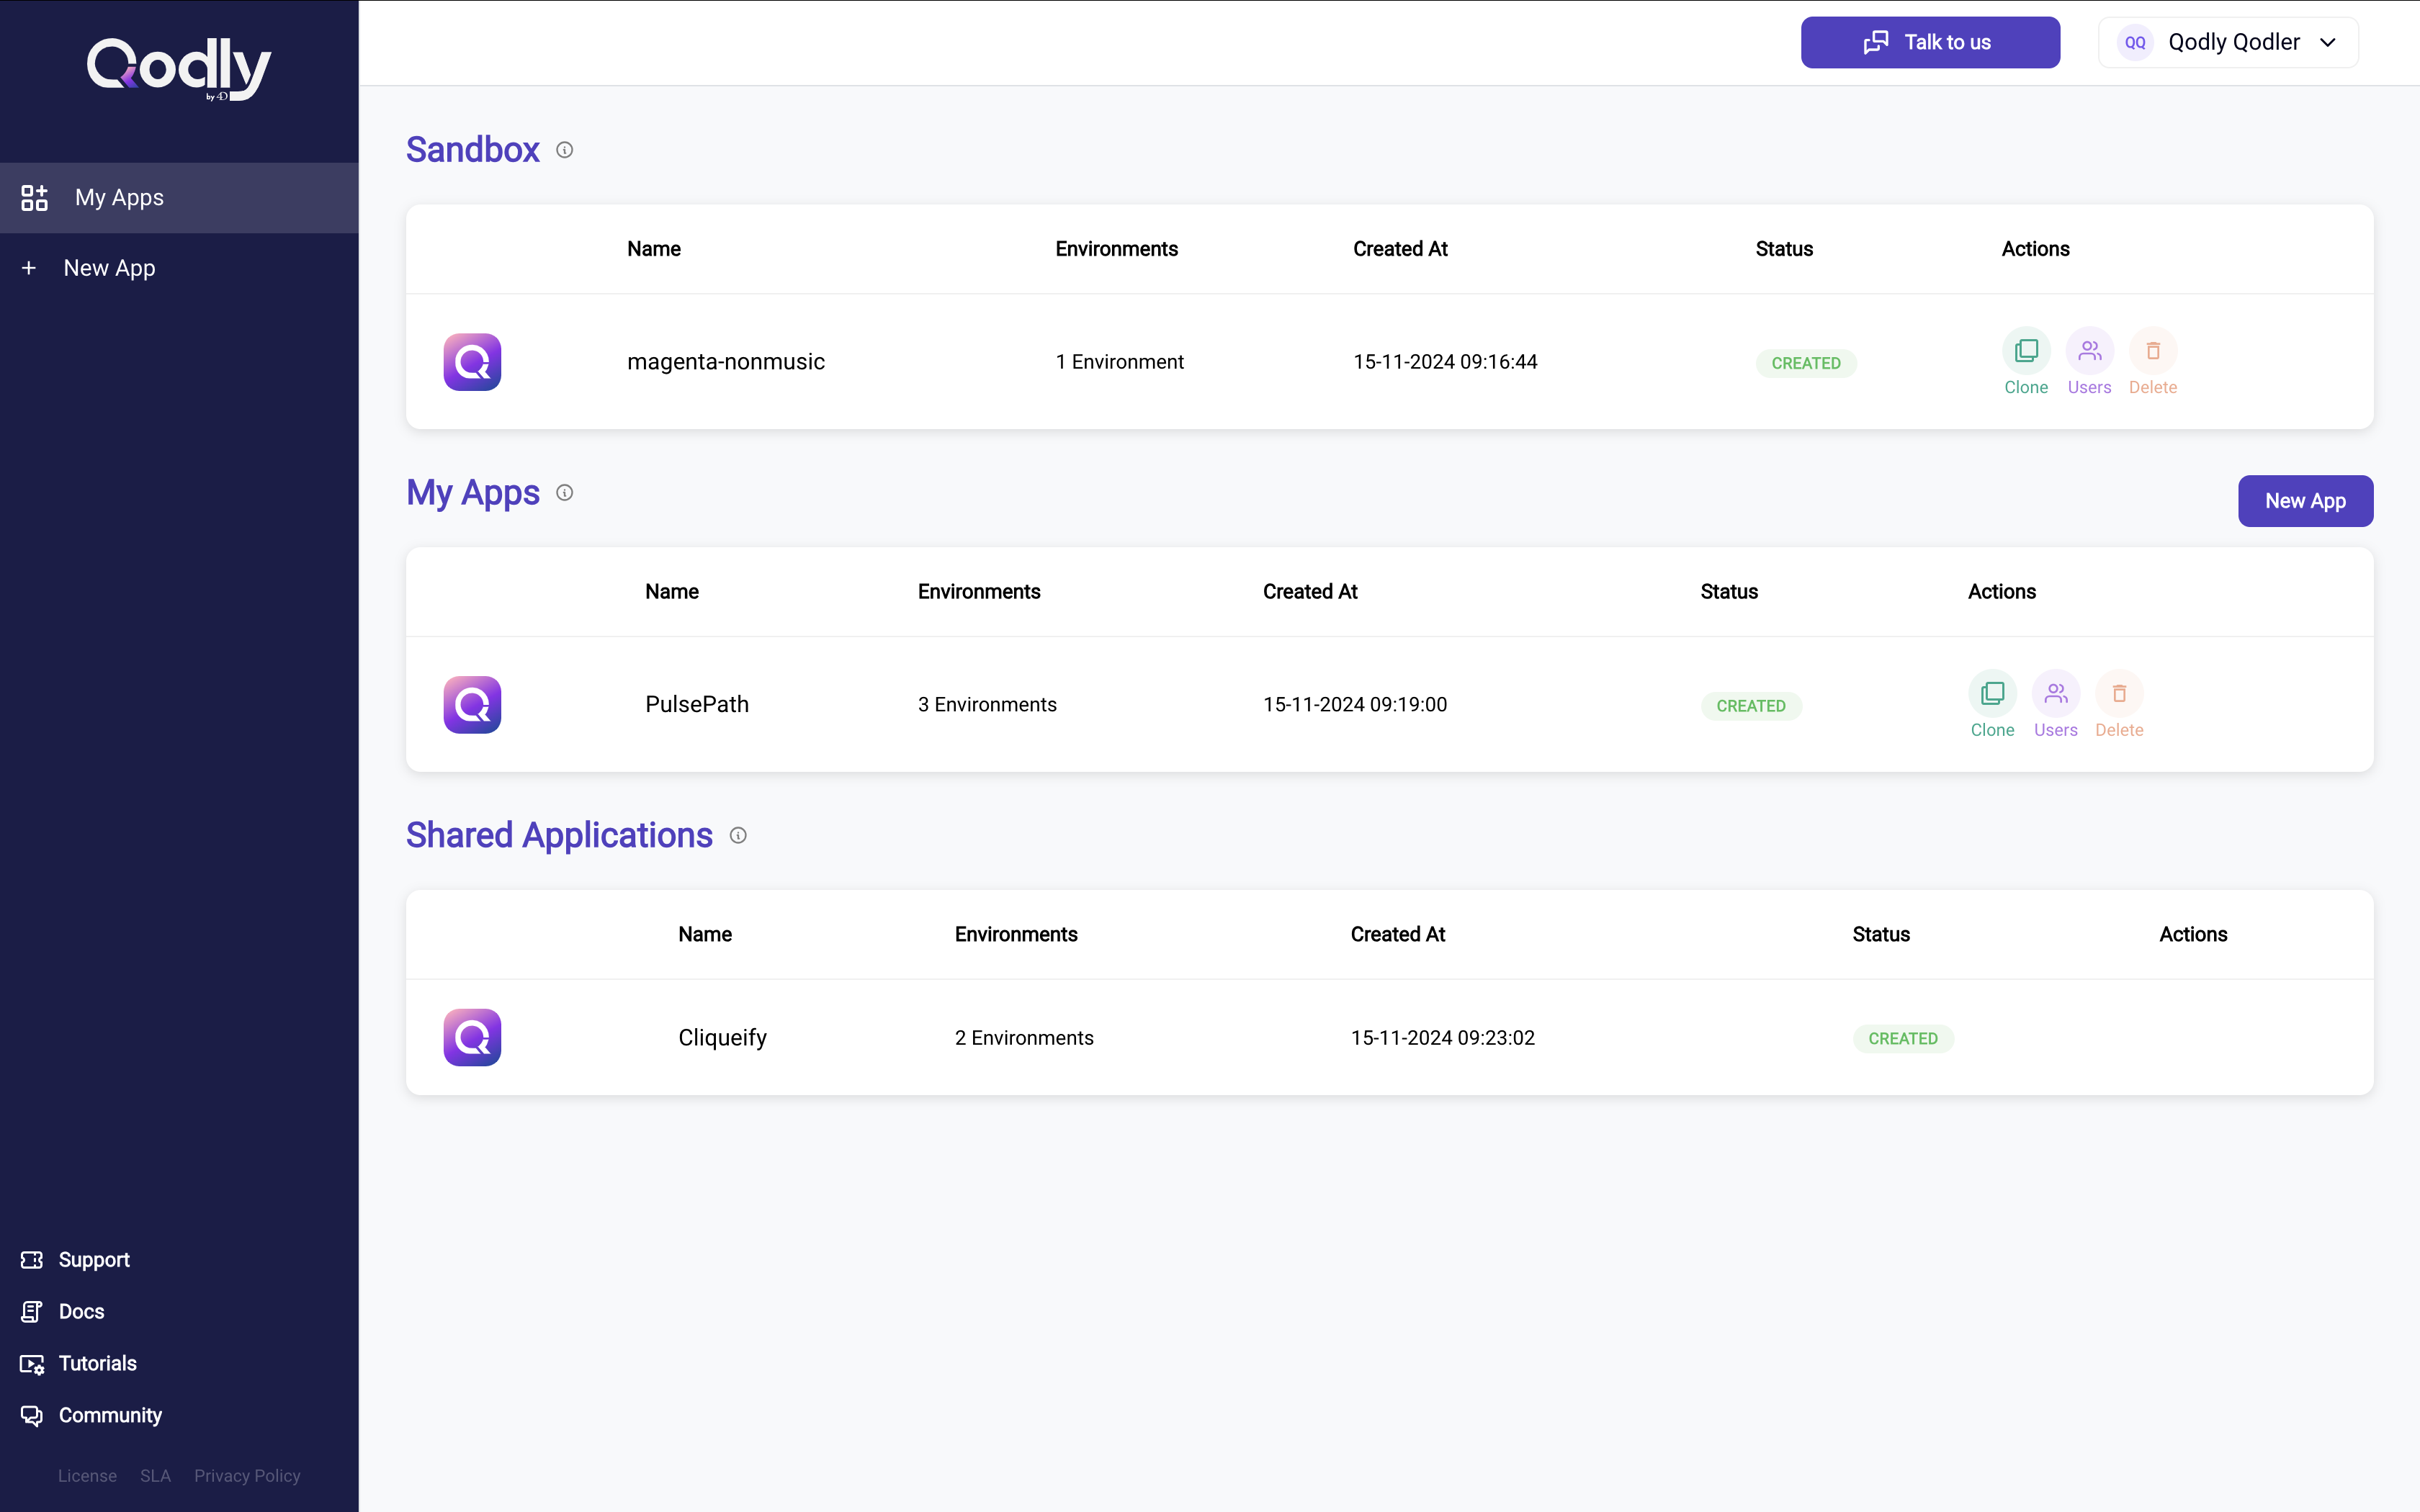
The Console homepage provides a centralized view of all applications associated with your Qodly account. Here, you can access, manage, and monitor various types of applications, including your Sandbox, paid applications, and applications shared with you by other users.
Console Homepage
The Console homepage displays an organized list of your applications, grouped by type:
- Sandbox: Appears as a separate section, with a single entry (since each user is limited to one Sandbox at a time).

- My Apps: Lists all applications you’ve created, including any paid applications or clones of the Sandbox.

- Shared Applications: Lists applications owned by other users that have been shared with you. Access permissions vary based on the owner’s settings, allowing you to collaborate with some limitations.

Each application is displayed with key details:
-
Name: The name assigned to the application.
-
Environments: The number of environments associated with the app (e.g., Development, Staging, Production).
-
Created At: The date and time when the application was created.
-
Status: The current state of the app (e.g., Created, Running, or Inactive).
-
Actions: Quick-access management actions that vary slightly depending on the type of application.
Managing Applications
Each application, whether Sandbox, My Apps, or Shared Applications, provides a set of actions that you can access directly from the Console homepage. These actions include:
| Action | Sandbox | My Apps | Shared Applications |
|---|---|---|---|
| Clone | Cloning converts the Sandbox into a fully functional paid application with additional features and no Sandbox limitations. | Cloning duplicates the configuration and code of the paid application (excluding data) to create a new project based on the same codebase. | Not Available. |
| Users | Allows you to add users for collaborative testing, but with Sandbox limitations. | Allows adding users with various roles (e.g., developer, tester, admin) for full project collaboration. | Not Available. |
| Delete | Permanently deletes the Sandbox. | Permanently deletes the paid application. | Not Available. |
| Wake Up | Available for the Sandbox when it enters Sleep Mode after inactivity. | Not Available. | Not Available. |
Application Overview Details
The Overview Page in the Console provides a summary of essential information for any application, including Sandbox, paid applications, or Shared Applications. This is the first screen you see upon accessing an application in the Console, giving you a quick snapshot of its current status, resources, and recent activities. Here’s a breakdown of each section:
Instance Information
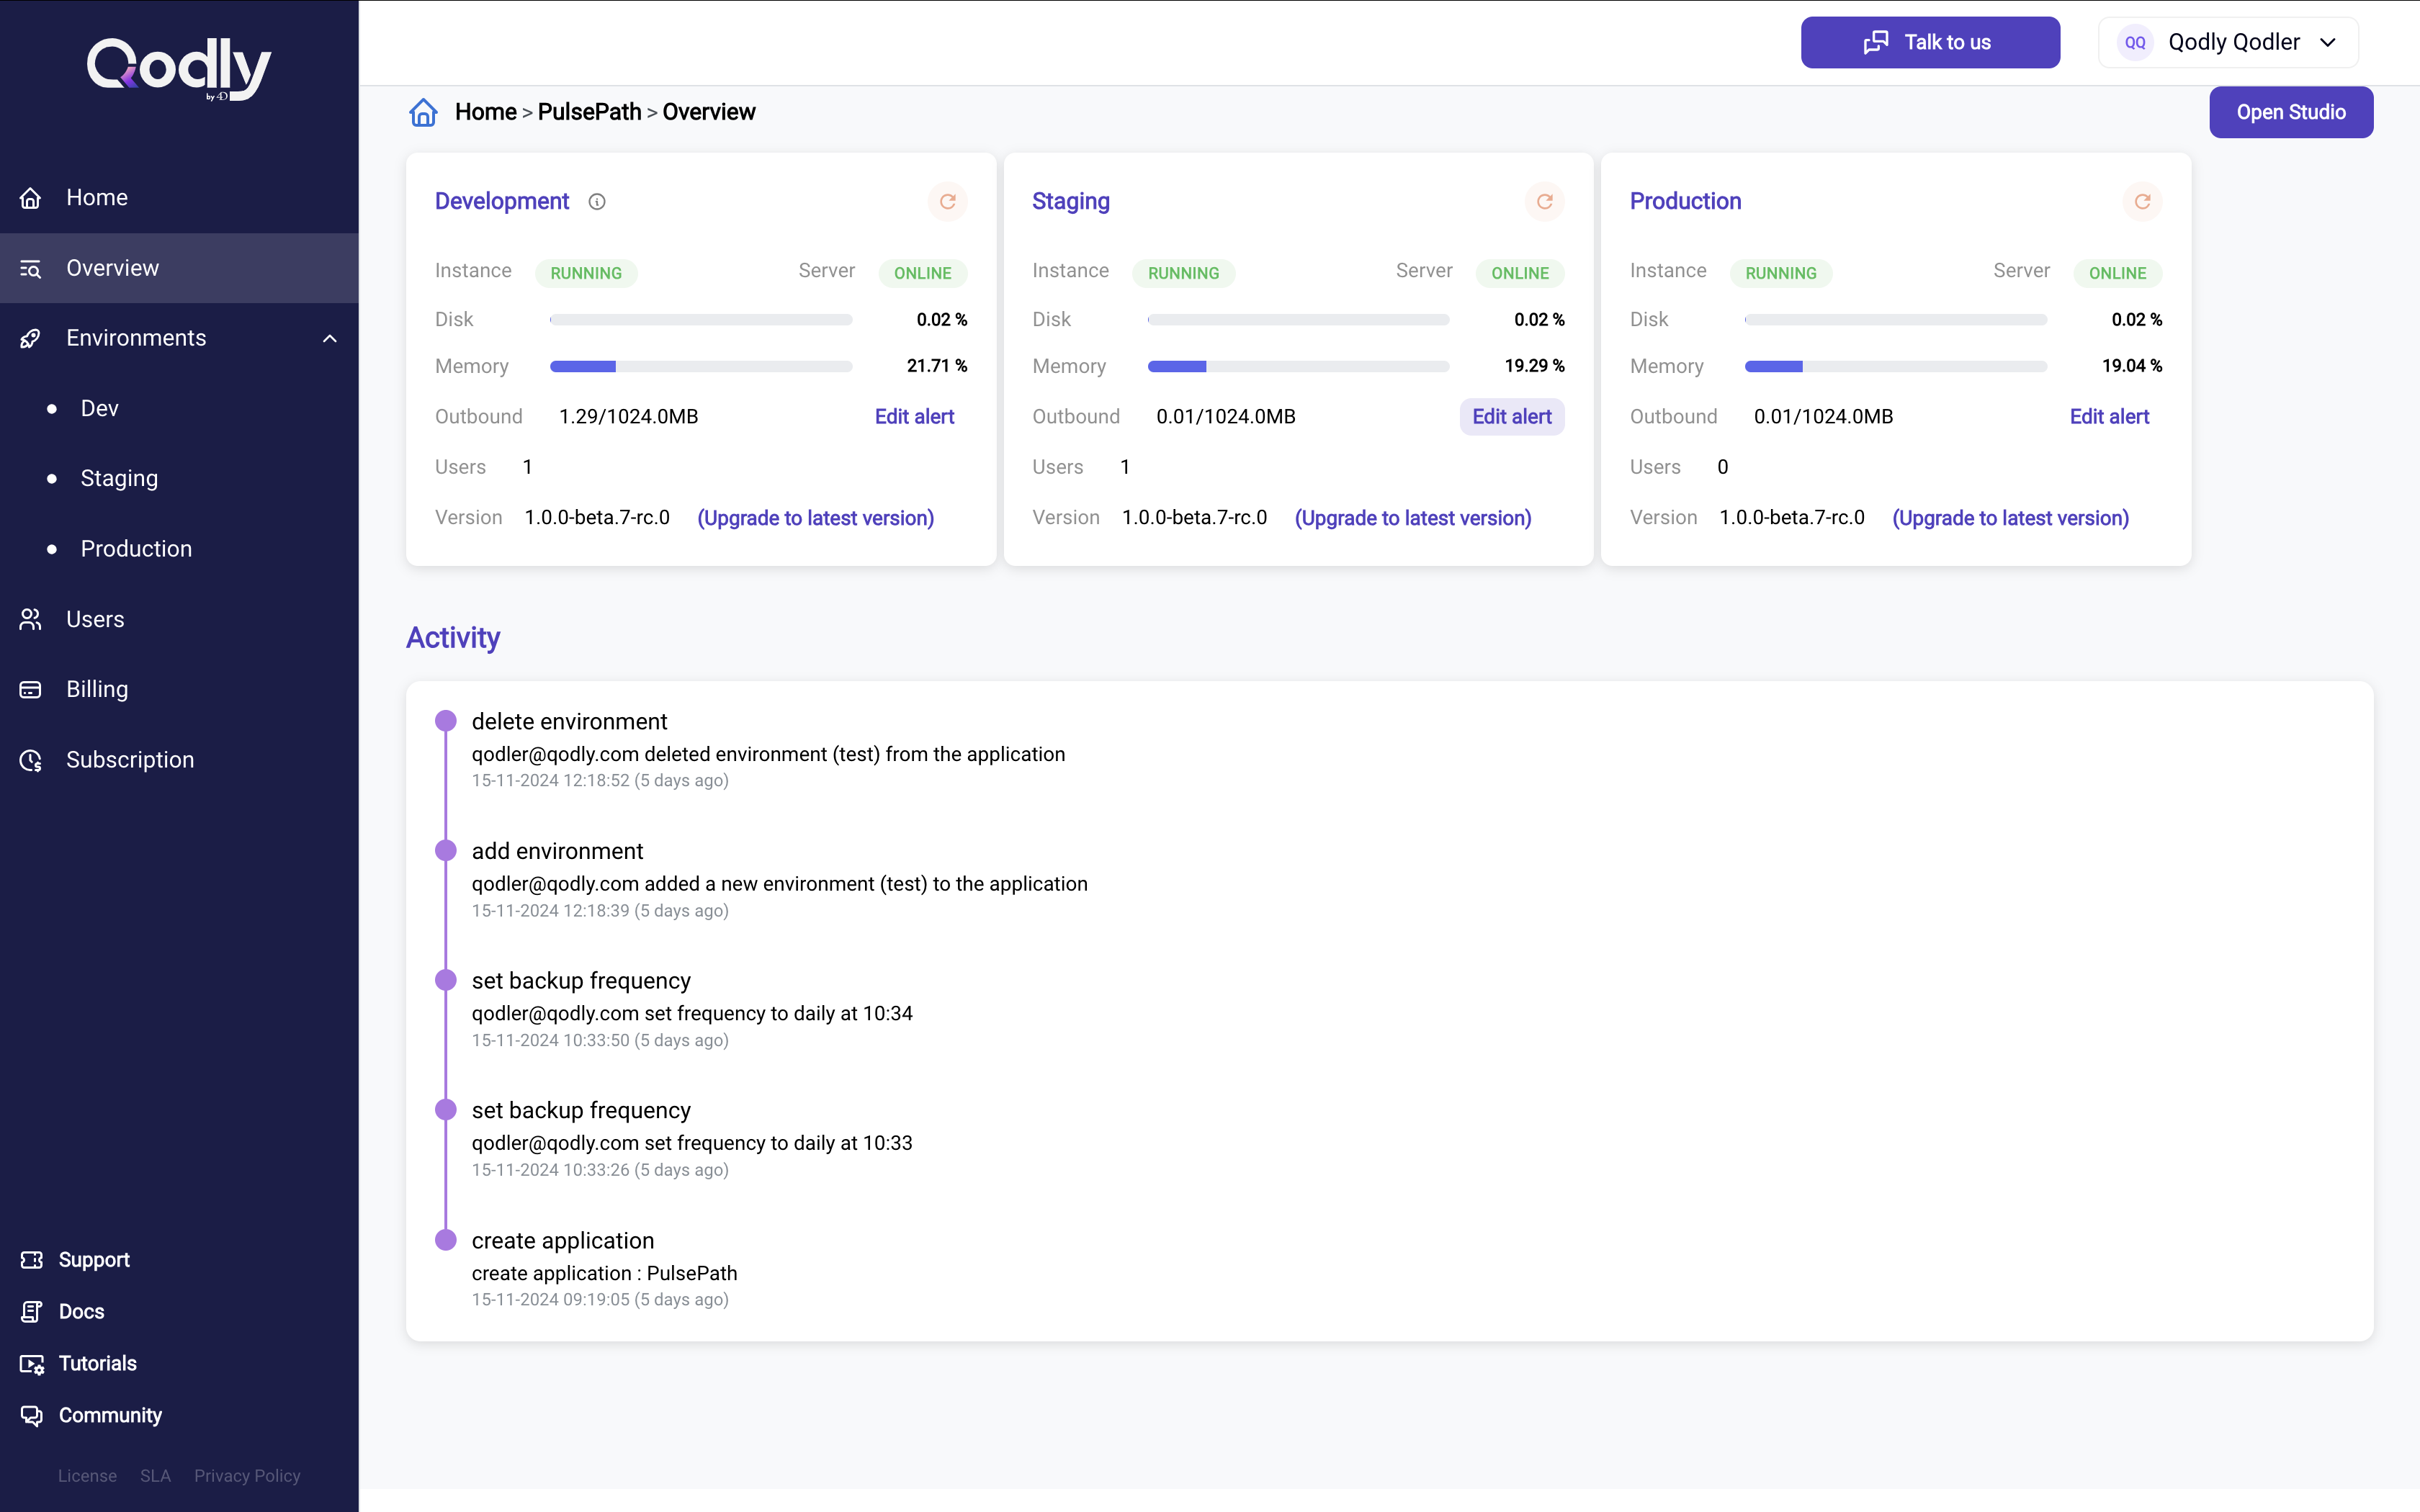
The top section of the Overview page displays key metrics and the status of your application’s environment, helping you monitor its health and resource usage:

-
Refresh button: The
button to refresh the information about the environment.
-
Instance: Shows the current state of the application instance.
-
RUNNING: The instance is active and operational.
-
PENDING: The instance is being set up and has not fully started yet.
-
OFFLINE: The instance is unavailable or has been shut down.
-
-
Server: Indicates the server’s current status.
-
ONLINE: The server is accessible and fully operational.
-
OFFLINE: The server is not accessible.
-
-
Disk: Displays the percentage of disk storage currently in use, providing a quick overview of your storage consumption. This metric helps you manage and adjust storage resources as needed.
-
Memory: Shows the memory utilization percentage of your application. Monitoring memory usage ensures that your application has sufficient resources to operate smoothly.
-
Outbound: Tracks the data consumption of your application, listing both the current usage and the allocated limit (e.g., 94/1024MB). Exceeding your bandwidth limit can lead to additional charges or a throttling of data transfers.
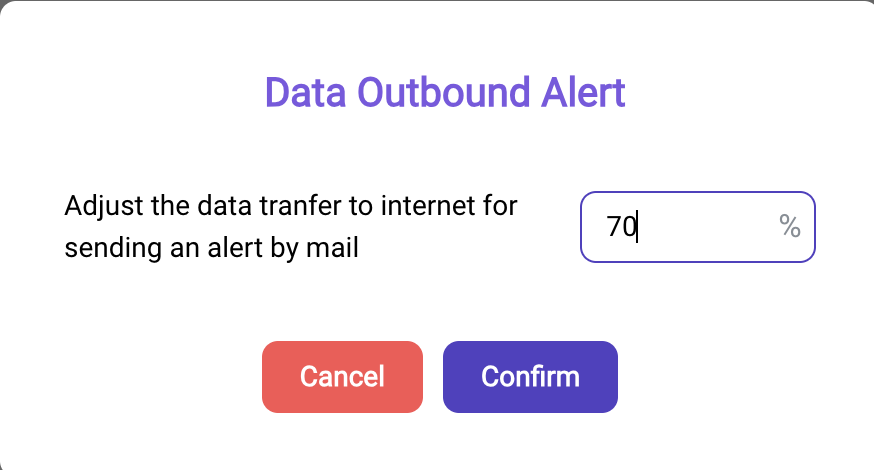
Edit Alert ButtonAn Edit Alert button is available in this section, allowing you to configure threshold alerts for outbound data usage. This feature ensures that you are notified before reaching critical levels of bandwidth consumption.
Steps to Configure an Alert:
- Click Edit alert next to the outbound data section.
- Enter the percentage threshold at which you want to receive an email notification.
- Click Confirm to save the alert, or Cancel to discard changes.
-
Users: Indicates the number of active users who have access to the environment.
-
Version: Displays the current version of Qodly running in the environment, with updates logged in the Activity section.
Upgrade to the Latest VersionIf a new version is available, a (Upgrade to latest version) link will appear beside the version number. Clicking this link initiates the upgrade process.
 danger
Upgrading may cause temporary downtime depending on the changes being applied, so plan upgrades during non-critical hours if possible.
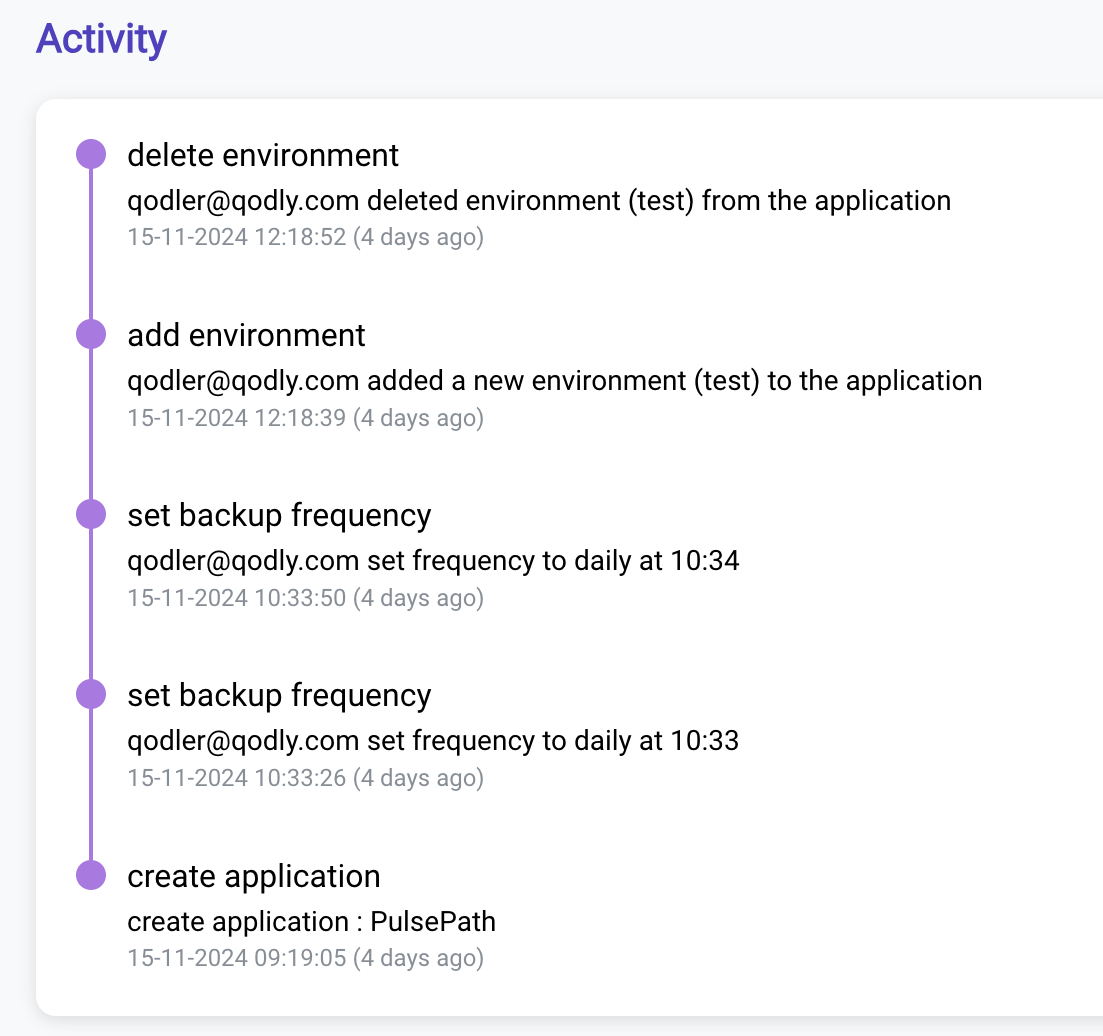
Activity History
Below the instance information, the Activity section logs recent actions and events within the application. This is particularly useful for tracking system changes and monitoring user activities over time, like:
-
Update Version: Logs version updates of Qodly for the environment, including the user who performed the update.
-
Sandbox Wake Up: Indicates when the sandbox was reactivated after a period of inactivity or sleep mode.
-
Start Server: Records each instance of the server being started, providing an audit trail of server uptime.
Each entry in the Activity history includes:
- Event Description: Details the action taken, such as updating the version or starting the server.
- User: Shows which user initiated the action.
- Timestamp: Displays the date and time when the event occurred.
Accessing Qodly Studio
To begin working on your application, you can click the Open Studio button located in the top-right corner of the Overview page. This button provides direct access to Qodly Studio, where you can build, configure, and customize your application.

Qodly Studio is only accessible in the development environment. Other environments, such as staging or production, do not offer access to Qodly Studio and are primarily intended for testing, showcasing, or final user deployment.
Qodly Account Management
The account management section in Qodly provides users with functionalities to manage their personal account details, view invoices for applications, and securely log out of the platform.
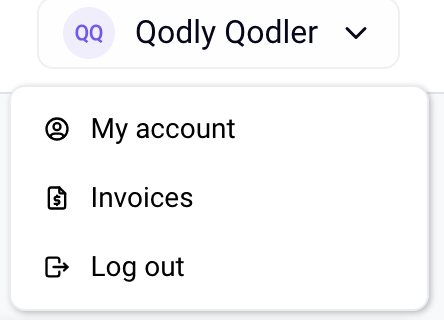
Account Dropdown Menu
Located in the top-right corner of the Qodly interface, the Account Dropdown Menu provides three options:
- My Account: Directs you to the account details page where you can view and update your account information or change your password.
- Invoices: Redirects you to the invoices page, displaying all invoices for applications you own or manage.
- Log Out: Logs you out of the Qodly platform.
My Account Page
The My Account Page displays an overview of the user's account details:
-
Company Name: The company associated with the account.
-
Name: The user’s name.
-
Email: The email address used to access the account.
-
Role: The user’s assigned role in Qodly.
-
Country: The user’s country.

This section provides two main actions:
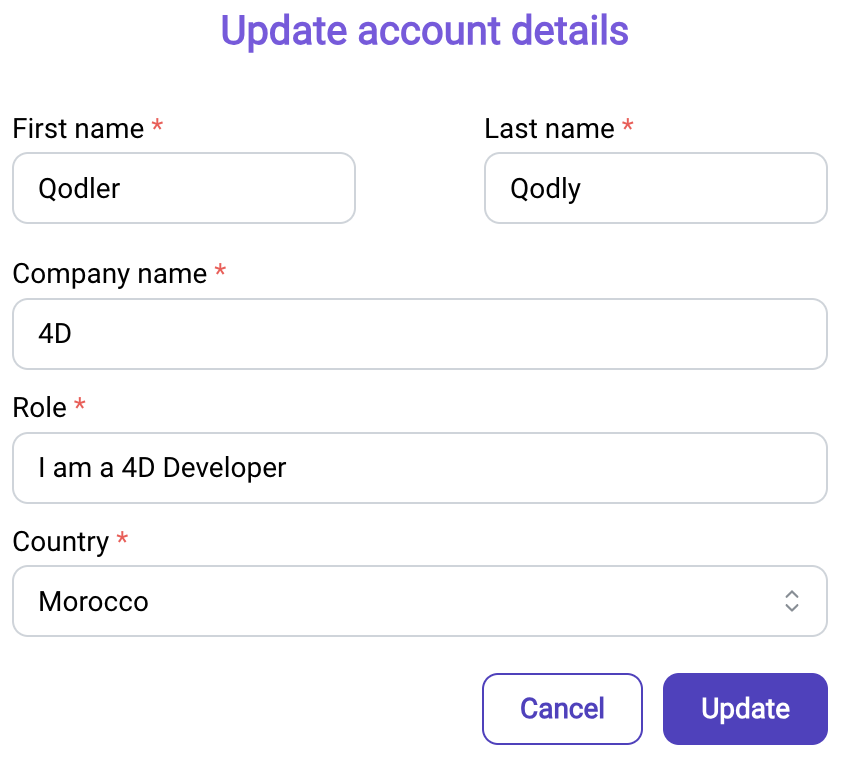
- Update Account Details: Clicking on Update Account Details opens a form where users can update their:
- First Name
- Last Name
- Company Name
- Role
- Country
After editing, click Update to save the changes or Cancel to discard them.
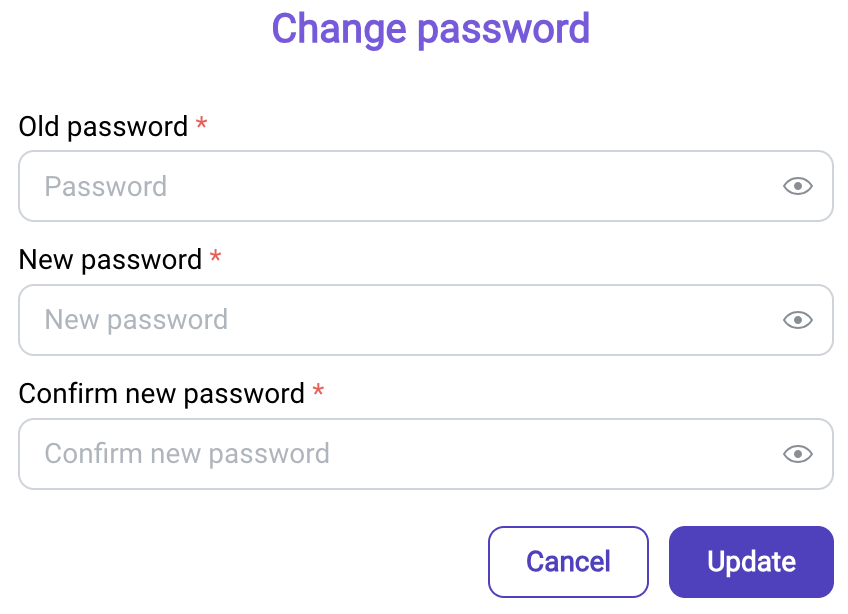
- Change Password: Clicking on Change Password opens a form requiring:
- Old Password
- New Password
- Confirmation of the New Password
Once all fields are filled, click Update to apply the changes or Cancel to discard them.
Invoices Page
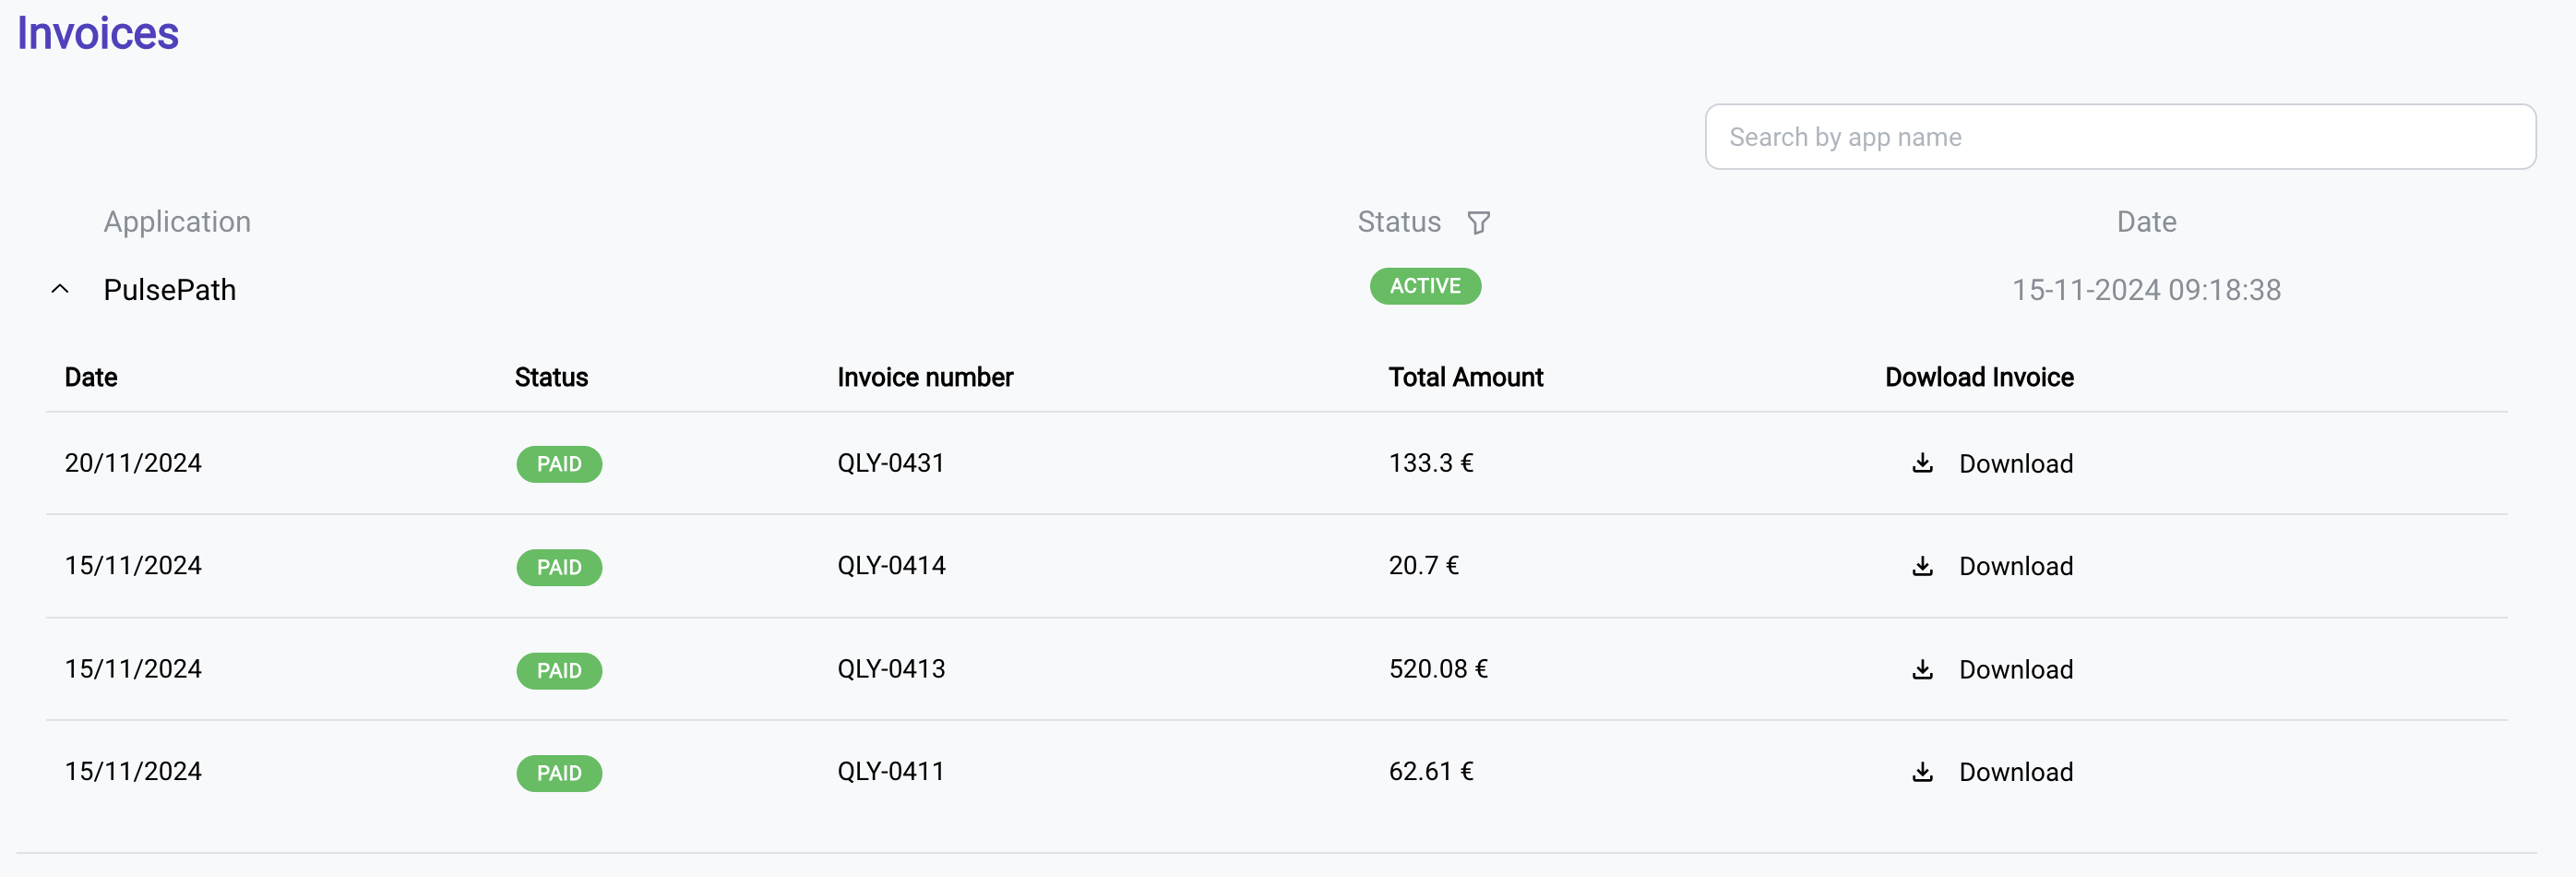
The Invoices Page provides a comprehensive view of all application invoices, offering detailed financial information and download options.
-
Displays all invoices related to your applications in a tabular format. Columns include:
- Date: The invoice issue date.
- Status: Payment status (e.g., Paid).
- Invoice Number: Unique identifier for the invoice.
- Total Amount: Total cost covered by the invoice.
- Download Invoice: Allows you to download the invoice as a PDF.
