API Keys
Overview
The API Keys tab in Qodly allows you to create and manage API keys for secure, programmatic access to your application’s resources. These keys enable external systems or scripts to interact with your application in a controlled and secure manner.
API Endpoint
The API endpoint serves as a gateway, allowing developers to interact with Qodly applications programmatically. Using standard HTTP methods, the endpoint can facilitate data access, trigger actions, or retrieve information by integrating with Qodly’s openDatastore command or REST requests.
API Key
An API key acts as a unique identifier for authenticating external clients. Each key is linked to a specific role, controlling the scope of access and actions permitted within the application. It must be included in the HTTP headers of all REST requests to validate the requester’s permissions. See below for more information.
Managing API Keys
To set up secure access, generate API keys and retrieve the relevant endpoint.
Accessing API Keys
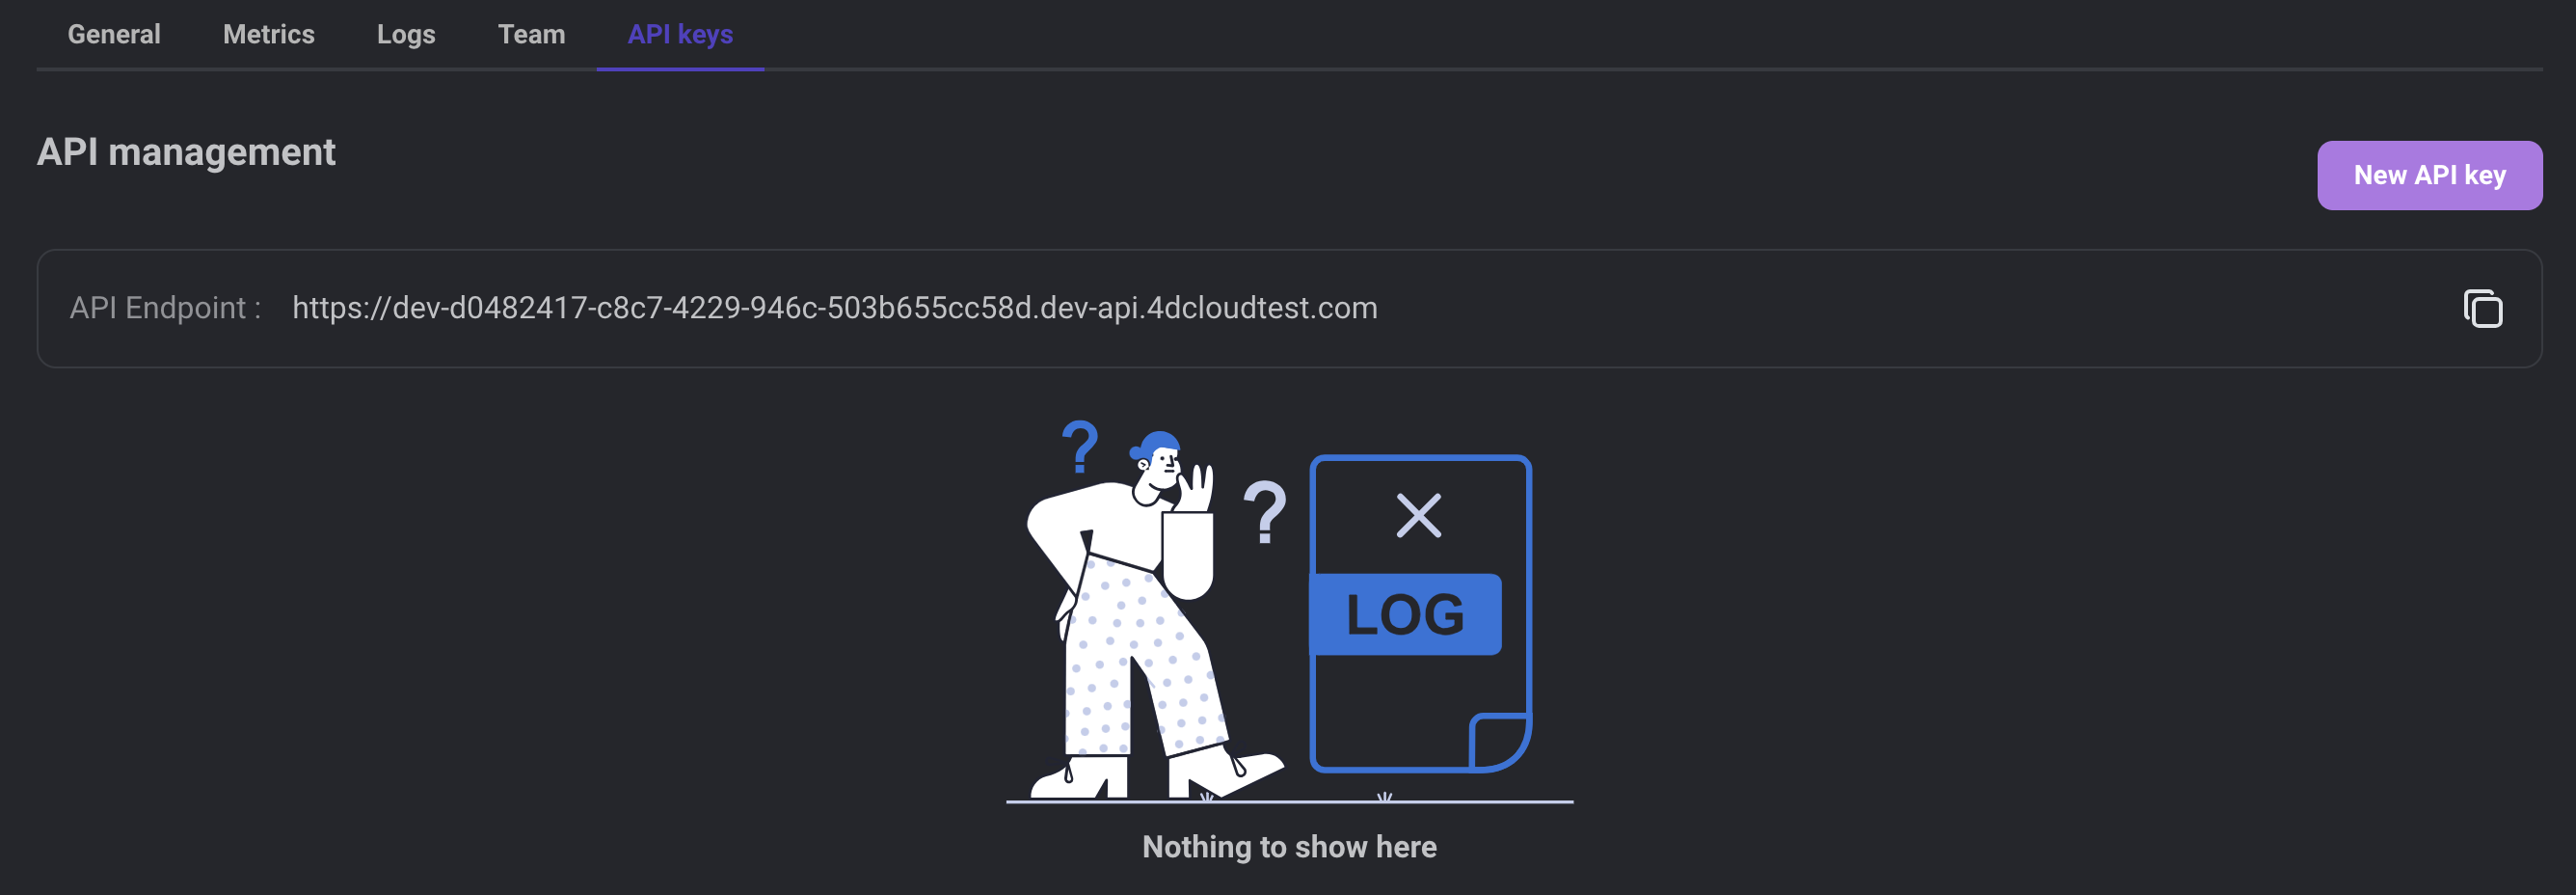
In your environment setup, navigate to the API keys tab, where you’ll see the API endpoint and a list of any previously created keys.

The initial API key management screen shows the environment’s API endpoint and provides an interface for creating new keys.

Creating a New API Key
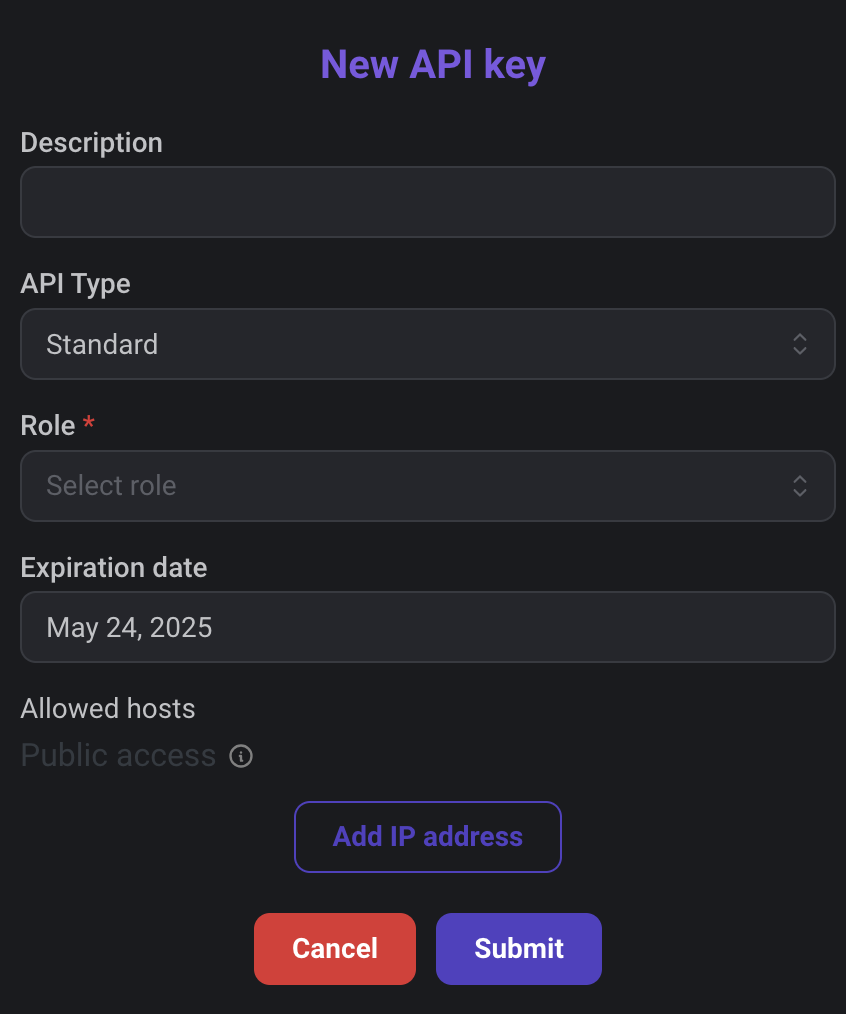
Click the button to open the API key configuration dialog. Define properties such as the key’s description, type, assigned role, expiration date, and allowed hosts.

| Property | Description |
|---|---|
| Description | A brief identifier for the key to help recognize its purpose. |
| API Type | Choose between two types: 1. Standard: This is the regular type, appropriate for most users, where access permissions are managed according to the assigned role. 2. Administration: Intended for developers of custom components, offering extended privileges that allow for comprehensive access and management of application data, bypassing standard role-based restrictions. |
| Role | Assigns access level based on application-defined roles. Default is Admin. |
| Expiration Date | Sets a validity period up to one year for security purposes. |
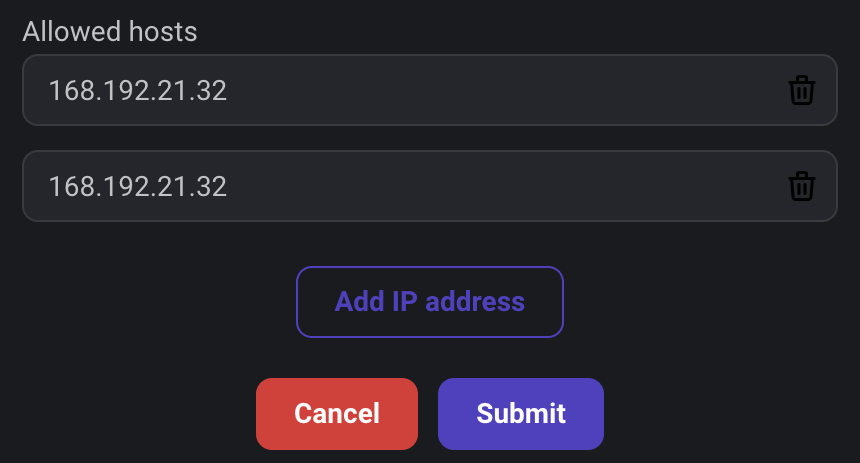
| Allowed Hosts | Restrict the API key’s use to specific IPs by adding IP addresses under this setting. |
This API key is initially configured for public access, allowing usage from any host. To specify restrictions to specific hosts, add their IP addresses.

Once complete, click Submit to create the API key.
Copying API Endpoint
Click the copy button beside the endpoint URL to use it in your application's REST calls.

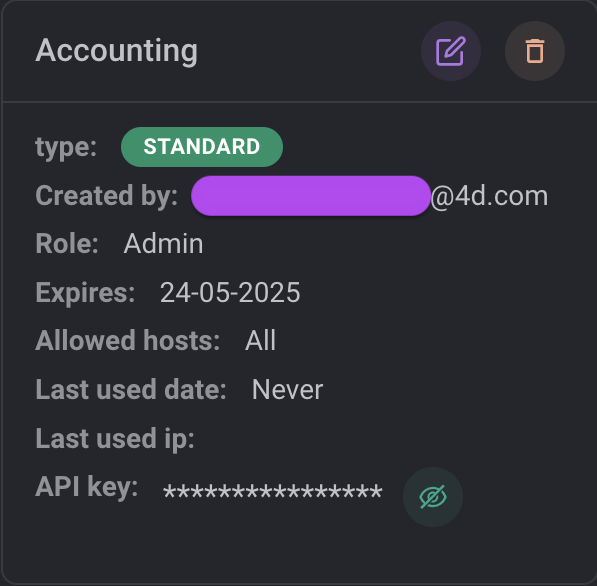
API Management Table
In the API management section, each key includes options to:
- Show API Key: This button
reveals the API key in the interface and includes a copy button
, enabling easy duplication of the API key for use in configuring your application or services.
- Delete API Key: Positioned next to the API key, this button
removes the key upon confirmation, safeguarding against unintended deletions.
- Edit API Key: Also adjacent to the API display, the edit button
opens a configuration dialog for modifying the API key's details.

Using API Keys
To authenticate REST requests to the Server, the API key must be included in the HTTP header. Here are two ways to handle API key integration:
-
Using the
openDatastoreCommand: When connecting to another Qodly application, use theopenDatastorecommand. Simply pass the API endpoint and key through thehostnameandapi-keyproperties in theconnectionInfoparameter. This method automatically includes the API key in the HTTP headers for underlying REST requests. -
Using the REST API Directly: Insert the
api-keyinto the HTTP header with the API endpoint URL in all REST requests. For a practical example, refer to the API endpoint usage example in Postman.
How to Manage Your API Access - Tutorial Video
This tutorial video provides a step-by-step guide on managing API access:
- Accessing the API Key in the Qodly Console.
- Authenticating requests with role-based permissions.
- Reading data based on user permissions.
- Creating new records via the API.